# Using Download Managers for Better Speeds and Stability Source: https://docs.renderjuice.com/docs/advanced-guides/using-download-managers-with-renderjuice Enhance download speeds and stability with our integration with most popular download managers. ## Why Use a Download Manager? For users who need the absolute best speeds, stability and the ability to pause and resume downloads, we enable download links to be copied and pasted (or imported) on all render outputs into most download managers. While we implement a ton of optimizations to ensure we maximize speeds throughout the whole process, there are some factors we cannot easily control for. **These include:** * **Browser limitations:** * The maximum number of network connections a browser like Chrome can handle per website. * The number of threads a particular tab can spin up. * **Your Local Setup:** * Your local network speeds * Network stability and interruptions * Your local system crashes * Your local computer specs incl. RAM, CPU, Network Card, etc. <Check> We will be shipping a desktop app some time in the future to help avoid issues with browser limitations. Nevertheless, download managers are still a great tool for your arsenal. </Check> **Download Managers typically include the following features:** 1. **Resumable Downloads**: They allow pausing and resuming downloads, which is crucial for large files or unstable network connections. 2. **Faster Downloads**: By splitting a file into multiple segments, download managers can make parallel connections. This results in faster, more efficient use of available bandwidth. 3. **Scheduled Downloads**: Users can schedule downloads for later, saving bandwidth or automating tasks during off-peak hours. 4. **Batch Processing**: They support downloading multiple files at once, managing large queues efficiently. 5. **Error Recovery**: Download managers handle interruptions (e.g., power outages) and retry failed downloads without starting over. 6. **Better Organization**: They help categorize and manage downloaded files systematically, saving time. 7. **Bandwidth Management:** Users can limit download speeds to prevent downloads from consuming all available bandwidth, ensuring other activities aren’t affected. 8. **Centralize downloads via multiple protocol support:** Download managers often support multiple protocols (HTTP, HTTPS, FTP, SFTP, Magnets & Torrents, etc.), enabling access to files from diverse sources and also the centralization of your downloads. 9. **Browser Extensions:** Some download managers offer browser extensions, making the downloading process easier. These extensions automatically detect downloadable files on a webpage or clipboard and will enable you to automatically put them into the manager’s download queue. 10. **Network Bypass:** Some download managers 11. **Virus Scanning:** Some download managers include built-in virus scanning for your downloads. Whether or not you want that is another question. If you have antivirus already, it’s probably not needed. 12. **Checksum Integrity:** This, unlike the above point about virus scanning is definitely a benefit. Download managers may verify file integrity by checking against provided checksums. This ensures the download was not corrupted in transit, basically ensuring that you’re downloading what you intended to download. 13. **General Organization:** Download managers typically offer sorted lists, folder presets, and naming conventions. This helps locate and categorize downloaded files without manually digging through folders. ## **Third Party Download Managers** Internally we’ve tested that we’re compatible with the following download managers: | Name | Windows | macOS | Linux | Popular | Good UI | Recommended | Open Source | Free | | ------------------------------- | ------- | ----- | ----- | ------- | ------- | ---------------------------------- | ----------- | ---- | | Free Download Manager (FDM) | ✅ | ✅ | ✅ | ✅ | ✅ | ✅ | ❌ | ✅ | | Motrix | ✅ | ✅ | ✅ | ❌ | ✅ | ✅ | ✅ | ✅ | | JDownloader | ✅ | ✅ | ✅ | ✅ | Meh | High configurability. Hard to use. | ✅ | ✅ | | Internet Download Manager (IDM) | ✅ | ❌ | ❌ | ✅ | ❌ | | ❌ | ❌ | | Neat Download Manager | ✅ | ✅ | ❌ | ❌ | OK | | ❌ | ✅ | Please download these at your own caution. While we’ve tested these internally and can review their use with our platform, we cannot guarantee the quality and safety of external products. Finally, it’s important to note that in the world of download managers it’s not particularly rare for the application to include bloatware. We recommend picking those that are Open Source as the source code being open can help avoid bloatware being bundled. ## Copying Links from Renderjuice to Clipboard to use Download Managers Within each render job, in the previews panel where you download outputs, you will now see dropdowns available with a Copy links to clipboard button to automatically grab links formatted to work with download managers. <Frame> <img src="https://mintlify.s3.us-west-1.amazonaws.com/renderjuice/images/download-outputs-preview-pane.png" /> </Frame> This is available on all download spots so that you can grab every possible selection of frames you want. In the above diagram: **(Label 1)** Download *all frames* of the complete set of outputs including different stereoscopy camera frames, composite node outputs, etc. **(Label 2)** Download only the composite node outputs. **(Label 3 and 4)** Download specific frames with more granular filters. You can specify frame ranges that you want to download and filter by camera, by composite node output, or together. You can also use the Nodes tab **(Label 4)** to filter *first* by the node output. ## Step by Step with Download Managers <Tabs> <Tab title="Free Download Manager (FDM)"> <Steps> <Step> For all download managers, press `Copy links to clipboard` on Renderjuice. </Step> <Step> Open the hamburger menu to see the option to `Paste urls from clipboard` . </Step> <Step> Click `Paste urls from clipboard` <Frame> <img src="https://mintlify.s3.us-west-1.amazonaws.com/renderjuice/images/download-managers/free-download-manager-hamburger.png" /> </Frame> </Step> <Step> You will see a dialog pop-up with the links to each frame populated. <Frame> <img src="https://mintlify.s3.us-west-1.amazonaws.com/renderjuice/images/download-managers/free-download-manager-dialog.png" /> </Frame> </Step> <Step> (Optional) Specify the subfolder you want to download it to, in this case, these frames are only the composite node outputs, so I’ve specified that. </Step> <Step> Download! </Step> </Steps> </Tab> <Tab title="JDownloader"> <Warning> JDownloader requires more configuration than is ideal and has some issues with general latency for adding large numbers of links. We add a guide here due to its popularity. </Warning> <Steps> <Step> For all download managers, press `Copy links to clipboard` on Renderjuice. </Step> <Step> Right click and press `+ Add New Links`. </Step> <Step> (Optional) Alternatively, you can paste via `Ctrl+V | Cmd + V` you will see this show up in the "LinkGrabber" tab. If utilizing the latter method, you will have to configure your download directory (called "Packages" in JDownloader) to group downloads into a subfolder. </Step> <Step> Use the Add New Links button to add links in batch or paste directly into the application window for JDownloader to automatically add the links to the queue. <Frame> <img src="https://mintlify.s3.us-west-1.amazonaws.com/renderjuice/images/download-managers/jdownloader-add-new-links.png" /> </Frame> </Step> <Step> In the `Analyze and Add Links` modal, paste your links. NOTE: If you have a ton of outputs, at this point, this may take some time. This also applies to the next step. <Frame> <img src="https://mintlify.s3.us-west-1.amazonaws.com/renderjuice/images/download-managers/jdownloader-analyze-and-add-links.png" /> </Frame> </Step> <Step> At this point, if you wish to download these outputs to a specific folder, you should do that by specifying a “Package Name” <Frame> <img src="https://mintlify.s3.us-west-1.amazonaws.com/renderjuice/images/download-managers/jdownloader-specifying-folder.png" /> </Frame> </Step> <Step> Now, hit continue and wait for all links to calculate and be ready. This may take some time depending on how many frames are being downloaded. </Step> <Step> Finally, hit `Start All Downloads` <Frame> <img src="https://mintlify.s3.us-west-1.amazonaws.com/renderjuice/images/download-managers/jdownloader-start-all-downloads.png" /> </Frame> </Step> </Steps> </Tab> </Tabs> # Introduction Source: https://docs.renderjuice.com/docs/introduction Welcome to the world of Renderjuice <img className="block dark:hidden rounded-xl" src="https://mintlify.s3.us-west-1.amazonaws.com/renderjuice/images/shadow-poster-light.png" alt="Hero Light" /> <img className="hidden dark:block rounded-xl" src="https://mintlify.s3.us-west-1.amazonaws.com/renderjuice/images/shadow-poster-dark.png" alt="Hero Dark" /> ## Getting Started Learn how to use Renderjuice to boost your render speeds by juicing up your renders! <CardGroup cols={1}> <Card title="Quickstart" icon="rocket" href="/quickstart"> Your first render in less than 3 minutes </Card> <Card title="Renderjuice 101" icon="stars" href="/renderjuice-101/preparing-blender-file"> Learn how to use Renderjuice from the ground up </Card> <Card title="Read our letters" icon="image" href="/letters"> Letters from our team to you </Card> </CardGroup> {/* ## Useful Resources Some other useful resources to help you as you use Renderjuice <CardGroup cols={2}> <Card title="Feedback & Roadmap" icon="map" href="https://www.feedback.renderjuice.com" > Got Feedback? Or want to see some of what we're working on? </Card> <Card title="Release Notes" icon="code" href="https://renderjuice.com/releases" > Stay up to date with the latest changes and read about the newest features </Card> </CardGroup> */} # Gigantic Thank You and Farewell to Early Access Source: https://docs.renderjuice.com/docs/letters/end-of-era-the-future ## Down Memory Lane Forgive me if I get a little sentimental, but what a journey it's been! **Do you remember when the website used to look like this?** <Frame> <img src="https://mintlify.s3.us-west-1.amazonaws.com/renderjuice/images/old-website-webflow.png" /> </Frame> **Or this?** <Frame> <img src="https://mintlify.s3.us-west-1.amazonaws.com/renderjuice/images/old-typeform.png" /> </Frame> **Or when we only had a Slack channel that was used for rendering? I had to manually render every job that came in and figure out every edge case.** <Frame> <img src="https://mintlify.s3.us-west-1.amazonaws.com/renderjuice/images/old-slack.png" /> </Frame> **You probably don't remember when it was called JuiceRender and was only a wait-list in Late 2021.** <Frame> <img src="https://mintlify.s3.us-west-1.amazonaws.com/renderjuice/images/old-juicerender.png" /> </Frame> ## Thank you! 
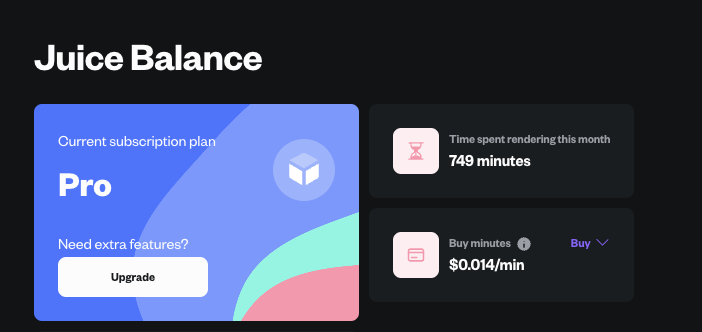
Believe it or not, it’s been many years since we started conceptualizing Renderjuice and architecting what is now Renderjuice. We’re pretty proud of how far we’ve come. We get feedback from people on how we are “enabling \<them> to run a studio from their own home” or that this is a “godsend” for them and are “single-handedly saving their asses”. It's incredible to read and is honestly such great motivation to keep pushing forward through challenges. We've learned with experience why this is not an easy feat to accomplish due to the challenging build, but will continue to serve you as best as we can. But we couldn’t have made this progress without you who have been with us from the beginning. We’ve had folks help us and be patient with us while we fixed little issues or even take the time to explain solutions that we needed to implement. For all that and more, *we are truly grateful.* With that said, we’ve got our sights on the future. We’re pumped for what’s on the roadmap for the next year and we can proudly say that though the product is far from perfect, it is getting pretty damn good. ## Ending Early Access Pricing and Perks for Early Users Back at the very beginning of this journey, I had no clue what the journey would look like and it was an isolated and lonely process finding out if anyone would even care about what I, running solo at that time, was building. I remember hopping on random Discord channels and Blender forums to figure concepts out. I jumped on video calls with strangers across the world in the arch-viz world to find out how complex this could be. At one point, I even read through a render manager manual of 300 pages and read it from front to back, not once, not twice, but three times. Once I actually jumped into the workload, I quickly realized I needed more hands on deck, the team grew with incredible and irreplaceable folks like Erlan and Khushnud jumping on-board. Being non-vc backed, everything was self-funded, and it wasn’t easy to make everything work out. But more than anything, I desperately needed more information from Blender users. Consequently, prices at the time reflected that need for information and validation that rendering for Blender was even possible online and we tried to make it as compelling as an offer as possible by offering a significantly discounted price. With the new progress we’ve made, we’ll proudly finally be reverting prices to what our original price targets were to reflect the end of early access. We’ll continue to experiment with prices in a way that is a good fit for people, and we’ll be including everyone eligible from Early Access to pick up very valuable perks along the way. We’ll also do our best to ensure Early Access users have discounts, extra perks, and where possible, the lowest rates available to show our gratitude. With continuous experimentation, we hope to improve our plans so that ideally you’re not reloading GPU minutes nearly as much on the Studio plan while improving speeds, performance, and stability. On the performance side, we’ve got some pretty neat tricks up our sleeves to show in this arena, just you wait. Eligible early access users should have received emails regarding their status and should see a badge reflected on the new profile page to demonstrate our gratitude. It should include discounts and extra perks, and I’ve personally written down every name that’s helped us get to where we are today. If you’re part of that list, you’ve probably spoken to me (Stevie) or Erlan before over chat. If you feel that you weren’t properly reflected on this list, or missing an email and have been with us since the beginning, please reach out, we’ll be happy to accommodate. Thank you, once again. We’re gonna do you proud. Stephen (with Erlan, Khushnud, Jeenbek, and the rest of the team) Date: October 15, 2024 # On Pricing Source: https://docs.renderjuice.com/docs/letters/on-pricing Lets talk biz. What is credit rollover and why a subscription? ### Bad Subscriptions Im with you and I totally get it, subscription fatigue is very real. But give me a minute to convince you that we built Renderjuice to be different. We designed and built Renderjuice ground-up to be a tool that can be relied upon consistently *without* the nuisance of having to cancel, subscribe, and unsubscribe over and over again. By allowing you to *perpetually* rollover your rendering minutes, you don't have to think about being wasteful when you don't need the tool. This is in contrast to subscriptions like Adobe Creative Cloud where if you use Photoshop once on January, but *don't* need it for a few months, you don't gain anything by staying subscribed on the plan. It's *wholly* a loss for not having unsubscribed and resubscribed when you need to access your software. There is absolutely nothing to be gained by not going through this tedious task. Ugh - truly annoying when companies milk money from "ghost" customers. We've all been one. We don't want to do that. With Renderjuice, your render minutes continue to rollover so it's totally *A-OK* to stay on a plan and come back when you actually need it. There's no loss to leaving Renderjuice on autopilot and accumulating render minutes for when you actually need it. With automatic minute rollovers and no ceiling on an amount to these minutes, when you aren’t rendering much for a few months, you can just set the tool aside. Maybe you and your team are still storyboarding, or maybe you personally just need some time off! During these times, you can relax knowing that it'll still be there when you need it and aren't ultimately losing anything by juggling another subscription. We want you to be able to relax and know that you’re receiving fair value. ### Good Subscriptions Think about the services you use all the time, the services that you don’t even bat an eye at when you get charged for it. Maybe you dont even realize its a subscription! A couple examples that I personally use are Verizon Wireless, my electricity bill, Google Drive, Figma, and Spotify. How annoying would it be to resubscribe to Spotify every time we want to enjoy a tune? The differentiatiors of these subscriptions is that they are services that are meant to be daily drivers. Theyre all things that we use *many times per day* and are fundamental to our workflow. It simply doesn't make sense to continue to unsubscribe and resubscribe to these, and the subscription model actually makes our lives more convenient. This is ultimately what we desire for Renderjuice. It's meant to be a tool that is *consistently* there. Whenever you need it. We hope that it will grow to be an irreplaceable tool and a fundamental piece of your workflow when working with 3D software. Just knowing that you can rely on rendering at high speeds and not lock up your computer ultimately can improve the way you work and unlock new ways of working with your team. I hope this sheds some light on how Renderjuice was designed to be a daily driver! We're always open to feedback. Please email me directly at [stevie@renderjuice.com](mailto:stevie@renderjuice.com) or use our chat bubble to get in touch. Until next time, keep blendering and rendering. *Stevie, Khushnud, Erlan* Date: February 22, 2024 # Operating the Business Source: https://docs.renderjuice.com/docs/letters/the-business We're here to stay, but it takes work and your support. Have you ever had a product you loved, only to have it disappear? It's a terrible feeling. It's like losing a friend. If it's a product you need for work, it's even worse. You have to scramble to find a replacement, but if it was acquired by a competitor, you're out of luck. You're stuck with whatever they decide to do with it. Many times, they'll just shut it down. Other times, they'll change it so much that it's no longer useful to you. The founders are left disincentivized since they've been paid out and the culture they once carefully built is gone. The product is no longer the same, and the community is gone. It's a sad story, yet it happens all the time. It's been over a decade, 13 years to be exact, since I started my first company. I have built many products and companies, some venture-backed, some bootstrapped. Most failed, but every single one taught me something new. I learned to design, engineer, and market. I learned to manage people, and I learned to manage money. The *biggest* thing I learned though was that I didn't want to build a company that would be controlled by investors and *have* to raise venture capital. I didn't want to build a company that would be acquired and shut down. I wanted something that would last into old age, and something that I would constantly be motivated to improve on. In addition, I wanted to build a company that would actually make money, but not the Silicon Valley way. I've done it before, and it sucks. You raise a ton of money, burn it all, and then raise more money. You don't operate the business, you operate the fundraising and spend most of your time perfecting a pitch deck and not the product. It's a terrible way to build a company. I'm sure it works for some, but not for me. I want to build a company that woill be profitable, and that will sustain itself. It's the only way to ensure the company will last. I was a huge audiovisual nerd ever since I saw Windows Media Player, and it had always been my dream to have amazing visuals that would work well with music. So, after deciding not to pursue a career in music, I decided to pursue a career that would help create amazing visuals through engineering. I spent a ton of time on the internet learning Blender. But after *attempting* to render a bare bones 3 second liquid simulation on my Macbook Pro and having it crash *after* locking up my computer for the whole day, I realized there was something to be pursued here. I realized that this had to be a common issue for many people. I tried to solution around something, but at the time I didn't have the experience and know-how to even begin to tackle the problem. But even then, I knew it was the perfect next project for me. It was a company that I could build for decades and not get tired of. So, Renderjuice is meant to emobdy all of these values. We're here to stay, and we're here to build a product that will last. The way we operate is meant to make that happen. Here's some rules that we follow: 1. We grow slowly, even capping growth and pausing new user sign-ups to ensure we can provide the best service possible. 2. We don't take outside investment unless it's explicitly clear that it can directly help us build a better product that will last. We don't want to be controlled by investors. 3. Build half a product, not a half-assed product. 4. We work hard, but don't burn out. 5. We keep the team small because hiring unncessarily is the fastest way to burn through cash and possibly lose control of the company. 6. We take time off if it's needed to keep the team's relationship with the project healthy. Until now, the company has been strictly funded by me and an initial 5k grant that I had won. We're not profitable yet, but we're working hard to get there. We're here to stay, but it takes work and your support. We're grateful for every single one of you that has supported us through the bugs, the crashes, and the downtime. Help us build a product that will last! Please reach out about new idea features, or your issues as they help us improve our service. But be patient with us as we try to implement them. We're a small team by intention, and we're working hard to make sure we can provide the best service possible. We're here to stay, and we're here to build a product that will last. Stephen # Data Security and Privacy Source: https://docs.renderjuice.com/docs/platform/data-security How Renderjuice handles your data. ## Data Security and Privacy Legal copy is tedious and hard to read, here's the very easy-to-read version: **We take security and privacy seriously. We understand that the privacy of your work is of critical importance *and especially in this industry.*** * Your files are encrypted in transit and at rest. * Renders are run in isolated environments, so your files **are never** shared with other users. * We do not sell your data to third parties. * We do not ever attempt to claim copyright or ownership of your files. * We do not use your data for any purpose other than rendering your files. * The only time we will access your files is if you need help and explicitly ask for support by opening a ticket and asking for help. * We do use a minimal amount of tracking to improve the platform - this is typical and helps us improve the platform. * We follow general best practices for data security and privacy. * We're flexible! If you need something that we haven't explicitly covered here. Please reach out. <Note type="info"> If you need increased security and privacy or need to comply with regulations and/or certifications, please reach out. We offer these guarantees on custom and enterprise tiers. If it requires a custom solution, we're happy to discuss. </Note> # The Platform Source: https://docs.renderjuice.com/docs/platform/the-platform What is Renderjuice? ## Platform Overview At a high level, Renderjuice allows you to render your Blender projects (and soon other DCC's) in a fraction of the time it would take to render locally. Users upload their Blender files to Renderjuice and adjust settings if needed. We manage the infrastructure for you and do our best to make sure that process is as smooth as possible. We handle driver issues, GPU support, Blender versioning, some GPUs not working, some having more VRAM or less VRAM and much more. ## Our GPUs The vast majority of our GPUs deployed to date have been NVIDIA 4090s. As new GPUs get released, we make sure to deploy them to Renderjuice as soon as possible so that you can take advantage of the latest and greatest hardware. We constantly benchmark performance and make sure we're using the best GPUs for every job and keep up to date. This helps both us and you get the best performance possible. When major upgrades are released, we re-evaluate what a minute is worth when spent rendering and always try to make sure you're reaping the benefits of technological advancements. ## File Storage and Reuse Renderjuice stores your input files for convenience and output files for a short duration when uploaded. This allows you to avoid long and tedious upload times, by re-using your files for multiple renders. By default, we store your files for 30 days after which all output and inputs are deleted automatically. This duration is configurable by request and deletions are also respected by request. ## No Render Fails Twice and Our Rendering Promise "No render fails twice" has been our motto since the beginning. It helps us keep in mind that we should make sure our platform is as reliable as possible and works for a wide range of users. It doesn't happen often, but if your render does fail, we will promptly attempt to fix the issue and get your render to completion as soon as possible. In the case that a render comes out incorrectly due to a fault of our system and *not of the user properly setting up their render (following correct packing, zipping, steps)*, we will almost always re-issue GPU minutes spent promptly. This includes *obvious* visual render discrepancies due to issues in our handling of your render. Ultimately, this is still up to our discretion, but we will always do our best to make sure you get the most out of your GPU minutes. <Accordion title="Getting Help"> If you need help with your render, please open a ticket and we will do our best to help you. If you're in a rush for a deadline, do let us know that so we can prioritize it and get you the help you need. Please try to be as detailed as possible! It helps us resolve issues much faster. </Accordion> <Accordion title="Extenuating Circumstances"> Only in a tiny minority of cases will we deny a re-issue, but it does happen. For example, if a customer has been re-rendering a known buggy render excessively causing a lot of resource usage or if a customer is clearly violating ToS and abusing the system. </Accordion> # How Renderjuice Releases Source: https://docs.renderjuice.com/docs/product-updates/introduction Navigating the release and update process for Renderjuice ## Release Conventions and Schedule While we do work internally according to `semver` conventions (this is that `v2.3.9` convention you see everywhere), `semver` is actually pretty technical and not easy to digest. So, we organize releases in a fashion that is more predictable and manageable for you. At the same time, we try to make it easy on us to translate what we've done to our users so that we can update frequently with ease. **Versioning Convention:**<br /> * `Major` version upgrades are *big* changes that we think are worth spending extra time communicating to you due to potential benefits. * `Minor` version upgrades can loosely be interpreted as feature additions, or notable updates! * `Patch` version upgrades are usually smaller changes that we don't think are worth a full announcement, but they *do* eventually stack up to help make Renderjuice better. ## What Renderjuice announces here: * Any product updates that may impact you or solve a small issue you're having * Any smaller changes we've made that you might not be aware of * At Renderjuice, we try not to be too shy about communicating what's going on internally, so you can get to know us better and what we do everyday. You can find summarized and larger announcements on our [official "What's New" blog](/whats-new). # Credit System Launch, Render UI Improvements Source: https://docs.renderjuice.com/docs/product-updates/releases/credit-system-launch-render-ui-improvements-2.0 Improved credit system with roll-over minutes and better visibility. Enhanced render UI and fixed edge case issues for smoother experience. **Renderjuice 2.0 was released on March 9 2024** ## Key Summary * Vastly improved credit system with a credits page for better visibility into remaining minutes for rendering. * Rolled over minutes every month with no caps, allowing users to save up and render more. * Improved switching between plans and automated billing processes. * Added new statuses to the render upload wheel and smoothed out the loading experience. * Fixed edge case issues with large file uploads causing navigation to act unexpectedly. ## Credit System Launch We’ve vastly improved our credit system and added a credits page underneath your Profile tab for better visibility into how many more minutes you have to render! <Frame> <img src="https://public-assets-renderjuice.s3.amazonaws.com/changelog-assets/2-0-tomato-married-cricket.png" /> </Frame> You will be able to see how many minutes you’ve used in the current month and see how many minutes you have left. With our credit system minutes are *rolled over every month* with no caps on how many minutes you can hold on to. So when your meter reflects more than 100%, congrats, you’ve saved up enough to render more! <Frame> <img src="https://public-assets-renderjuice.s3.amazonaws.com/changelog-assets/2-0-aquamarine-cool-hookworm.png" /> </Frame> We’ve improved the experience on switching between plans as well and automated some core functionality internally for billing processes. This includes things that impact renders, particularly some edge cases where users are *about* to run out of credits and are unlikely to have enough minutes to finish the requested render. ## Render UI Improvements and Fixes We’ve added a couple new statuses to the render upload wheel and smoothed out the loading experience so that uploading, validating, rendering, go smoother. There were a couple tiny edge case issues with large file uploads causing navigation to act a lil funky so we’ve fixed that. # On-the-fly Customization of files, Better Blender Legacy Support, Storage Improvements Source: https://docs.renderjuice.com/docs/product-updates/releases/enhanced-customization-and-blender-integration-5.3.0 This update allows users to adjust output format, resolution, samples, and frames-per-second settings without the need to re-upload their projects. Enhanced the external stats page for better insight and introduced a new Blender integration page showcasing recent updates and integration details. **Renderjuice version 5.3.0 was released on January 3, 2025.** ## Key Summary * Enhanced storage infrastructure for faster download of outputs in most scenarios. * Improved time to boot speeds of render nodes. * The validation phase is now skippable when re-rendering a file! * You can now adjust output format, resolution, samples, and frames-per-second settings without the need to re-upload your project. * New page [stats](https://www.renderjuice.com/stats) for keeping track of how we're doing internally in a transparent way. * New page [blender](https://www.renderjuice.com/blender) for showcasing our integration with Blender. * EEVEE rendering has been improved for older Blender versions `3.3` and below. # New Documentation Website, Accelerated Speeds for ALL tiers, and more! Source: https://docs.renderjuice.com/docs/product-updates/releases/new-documentation-website-accelerated-speeds-for-all-tiers-and-more!-1.6 New Documentation Portal, Accelerated Speeds for ALL tiers, Blender 3.6.8 support, preparations for Blender 4.x.x. **Renderjuice 1.6 was released on February 29, 2024** ## Key Summary * Improved stability and added support for Blender 3.6.8. * Infrastructure improvements to handle upcoming Blender 4.x.x versions. * Accelerated download and upload speeds now available for all subscription tiers. **Summary:** * New Documentation Portal * Accelerated upload and download speeds are now offered on all subscription tiers. * Stability Fixes ## New Documentation Portal Renderjuice now has a new, easy to navigate, documentation portal at [https://www.renderjuice.com/docs](https://www.renderjuice.com/docs). We built Renderjuice to be as powerful as is needed by the user without complicating things. With that same philosophy, we built our documentation to be easy to navigate and read and most importantly, easy for us to update so that it always stays up to date! ## Accelerated Download and Upload Speeds for All While we initially had launched accelerated download and upload speeds for pro tier users and above, given that our users are from all over the globe, we’ve decided that it’s best to allow everyone to have the benefit of the increased speeds. So accelerated speeds are now available to everyone! This was a trade-off for us between convenience and cost, but ultimately we saw some users in very-remote locations (from the US) with less-than-ideal network speeds and found that uploads and downloads was too slow not to offer this. Enjoy! 🎉 ## Blender Version 3.6.8 and 4.x.x With new Blender versions constantly being released, we’ve improved our infrastructure to handle new Blender versions far better and also added support for Blender 3.6.8. We also have our eyes on Blender 4.x.x, the upcoming EEVEE render engine and more so we’ve improved some internal processes and infrastructure to get ready. # New “Validated” Status, Validation Phase Failover, Renderjuice App Version Update Process Source: https://docs.renderjuice.com/docs/product-updates/releases/new-validated-status-validation-failover-renderjuice-app-update-process-2.5 New Validation Status **Renderjuice 2.5 was released on April 3, 2024** ## Key Summary * Improved validation phase with new "Validated" and "Validating" statuses for error-free file checking. * Smoother transition from validation phase to rendering phase. * More robust validation services with better handling of system failovers. * Cleaned up old code, refactored existing code, and enforced better code conventions for improved performance. ## Better Validation Experience The validation phase now as new “Validated” and “Validating” statuses that reflect when a file that has been uploaded to render has successfully been checked for any errors. During this process, we will provide logs that indicate if there’s anything important to take note of. For example, if you’re missing a texture and the platform believes it to be possibly important, we’ll let you know right in the app. While we were already doing *some* of this previously, this experience should now be smoother and the transition from the validation phase to the rendering phase is a lot easier to work with. <Frame> <img src="https://public-assets-renderjuice.s3.amazonaws.com/changelog-assets/2-5-emerald-circular-gecko.png" /> </Frame> ## More Robust Validation Services The validation phase should also now handle system failovers better. While we try to maintain as high of an uptime as possible, it’s inevitable that things break. We’ve made recovery of this process more likely, so even if things go down, users won’t notice. ## Internal Codebase While you and other users won’t likely notice this, we definitely do. We’ve cleaned up some old code that wasn’t going used, refactored some existing code particularly for our validation services, and enforced better code conventions via some automations ⚒️. # Public Roadmap, New Feedback Module, On-Demand Credit System Enhanced Source: https://docs.renderjuice.com/docs/product-updates/releases/public-roadmap-new-feedback-module-on-demand-credit-system-enhanced-2.2 🚀 Public feedback board implemented, new Studio plan with 150,000 minutes, improved pricing page, authentication and credit system optimizations. **Renderjuice 2.2 was released on March 16 2024** ## Key Summary * Improved render stability for early beta users who couldn't re-sign up or log in. * Optimized the credit system for better performance. * Added a public feedback board for feature requests and bug reports. * Introduced a new "Studio Tier" plan with 150,000 minutes and faster GPU speeds. * Updated pricing page to provide more current information and better context for new users. ## Public Roadmap & Feedback In the spirit of our motto, “*No Render Fails Twice”*, we’ve implemented a public feedback board where you can submit feature requests, report bugs, and we can communicate back whether or not we’re working on them and notify you when they ship. The feedback page is available on the navbar on the bottom left and can be visited directly at [https://feedback.renderjuice.com](https://feedback.renderjuice.com/). We’re still available directly in the chat bubble of course. Stop by and say hi 👋 or let us know if you need any help, we’re happy to provide guidance whenever and usually pretty quick to. The chat bubble and the feedback board are easy ways to get in contact with us, and we directly use these to prioritize internally. We even hop on video calls when users have issues that we think are critical to resolve, so don’t be shy to reach out when you need any help! <Frame> <img src="https://public-assets-renderjuice.s3.amazonaws.com/changelog-assets/2-2-azure-toxic-junglefowl.png" /> </Frame> <Frame> <img src="https://public-assets-renderjuice.s3.amazonaws.com/changelog-assets/2-2-coffee-vital-hornet.png" /> </Frame> ## New Studio Plan & More Descriptive Pricing Page We’ve been lucky to not have to focus on marketing a lot so far, so we haven’t updated our pricing pages to match our improved speeds, and add better context for new users. Our pricing page should now reflect more current information and be easier to understand the different tiers. We’ve been blown away by requests for even more minutes, so we’ve added a new “Studio Tier” that comes with a whopping 150,000 minutes and speeds of 30 (yes thirty!!) NVIDIA 3090 GPUs running at the same time. For users who need even *more than the Studio plan* 😮, we’ve made it easier to reach out to us so we can help tailor make the best custom plan. ## Other Tiny Quality of Life Improvements We’ve resolved some edge case authentication issues when users who signed up in early beta couldn’t re-sign up or log in. We’ve done some optimizations on the credit system front. # Render Edge Case Fixes, Credit System Improvements, UI Default Dark Mode, Quality of Life Source: https://docs.renderjuice.com/docs/product-updates/releases/render-edge-case-fixes-credit-system-improvements-ui-default-dark-mode-quality-of-life-2.1 Render stability improvements, credit system enhancements, default dark mode UI, and internal error handling updates in this release 🚀 **Renderjuice 2.1 was released on March 12, 2024** ## Key Summary * Improved render stability by enhancing retry logic on failure and fixing GPU shutdown issues. * Enhanced the on-demand budget billing to address edge cases where users were running out of credits during renders, providing earlier notifications. * Improved performance of the "rendered this month" section of the credits tab. * Made dark mode the default UI theme, based on team preferences, while still allowing users to toggle to light mode. * Fixed UI configuration issues, including dark mode/light mode toggling and nav bar toggling not being saved across sessions. * Upgraded internal infrastructure to better handle error reporting during the validation phase, ensuring proactive issue resolution. ## Render Edge Case Fixes We’ve improved render stability behind the scenes by improving our retry logic on failure. There were also a few edge cases where our GPUs were shutting down before reporting completion of rendering frames, so we’ve fixed that! ## Credit System Improvements With the launch of our new credit system, it was destined that there were a few things we see that we can improve! We’ve fixed a few issues with the on-demand budget billing. There were edge cases when users were running out of credits during renders, so we’ve made that a bit more transparent by adding a few checks here and there and notifying users earlier on in the process. This release also enhances the performance of the “rendered this month” section of the credits tab. <Frame> <img src="https://public-assets-renderjuice.s3.amazonaws.com/changelog-assets/2-1-yellow-controlled-sheep.png" /> </Frame> ## UI/UX Quality of Life Dark mode 🌑 is now the default as opposed to light mode 🌕 by default! I asked around the team and turns out we’re all generally using dark mode to develop, so it’s only natural that the dark mode experience is slightly better than the light mode experience. The option is still available of course to toggle to light mode. We’ve also fixed some issues with the UI configurations including dark mode / light mode toggling and nav bar toggling not being saved across sessions. It should now properly save your dark mode sessions as dark mode, and your nav bar should stay minimized if that’s where you left it on your computer. This won’t persist *across* computers, yet, but this should hopefully offer 80% of the ideal experience. <Frame> <img src="https://public-assets-renderjuice.s3.amazonaws.com/changelog-assets/2-1-coffee-individual-caterpillar.png" /> </Frame> ## Internal Error Reporting We’ve improved our internal infrastructure to better handle reporting errors during the validation phase. This is crucial as it helps us be proactive and get on issues fast! This is what we’re known for and we definitely don’t want to slow down as the system gets more complex. # Rendering Improvements on Small Render Jobs on Renderjuice, Quality of Life Enhancements for Team Source: https://docs.renderjuice.com/docs/product-updates/releases/rendering-improvements-on-small-render-jobs-on-renderjuice-quality-of-life-enhancements-for-team-2.6 Improved small job rendering speed, optimized internal render testing, and added new test cases for better user experience. 🚀 **Renderjuice 2.6 was released on April 8, 2024** ## Key Summary * Improved rendering performance and boot times for small jobs, resulting in faster and smoother rendering experiences. * Enhanced internal render testing with pixel by pixel comparisons to ensure accurate and expected results for users. * Added new test cases, including the barbershop .blend demo file for EEVEE and similar files using OPTIX for denoising, to ensure the functionality of different rendering methods. ## Small Job Rendering Boot Times, Ease of Use It’s quite typical for users who haven’t used Renderjuice a ton to render *very* small jobs, typically 1 frame or 1-10 frames. While we excel at bigger job renders, hundreds and thousands of frames, we hadn’t really optimized for the 1-10 frame case. These smaller jobs should now render far more smoothly and should start faster and should now cost us internally less. ## Internal Render Testing We previously built out our own render service that we call “shepherd”, the manager of our farm. Get it (haha?…). Nevermind. This service is meant to do pixel by pixel comparisons of our renders to ensure that when we ship new software that users get what you expect back. This wasn’t utilized enough, so we’ve made it easier to use for our team and added some new test cases, including the famous barbershop .blend demo file for EEVEE and a few other similar files that used OPTIX for denoising. This way we can check that EEVEE is working just as well as CYCLES. # Rendering, Rendering Blender Version Compatibility, Rendering with OPTIX, Rendering Determinism Source: https://docs.renderjuice.com/docs/product-updates/releases/rendering-rendering-blender-version-compatibility-rendering-with-optix-rendering-determinism-2.3 Improved rendering stability and determinism in our latest release, resulting in significantly fewer issues and tickets related to rendering. **Renderjuice 2.3 was released on March 22, 2024** ## Key Summary * Improved rendering stability by implementing a new internal application that compares rendered images pixel by pixel. * Enhanced compatibility by upgrading the system to ensure Blender build versions are better maintained. * Implemented new code processes for automatic code checking. * Restructured application to improve scalability and performance. * Developed comprehensive test suites to quickly identify issues in new features. * Streamlined internal render farm tooling for easier feature development. * Addressed OPTIX denoising issues by using OPENIMAGEDENOISE (OIDN) as a fallback. * Reduced rendering-related issues and tickets by more than half since the release. * Improved validation phase with better status handling and transitions. ## Rendering, Rendering, Rendering Our team has been on a bit of a rendering stabilization tear recently, and we’ve been adding a ton of improvements left and right. We increased general performance and handled a ton of edge cases. We want better determinism when rendering wherever, so *you* and all of our other users know what to expect when you use [renderjuice](https://renderjuice.com/). While we have a *very very* *strong* track record of rendering without issue, this is the crux of our product. So our focus has actually been on vastly improving its core capabilities for 3-4 months now behind the scenes. This is the public release of all of that work. Phew! **Couple things we did:** * We wrote a whole new internal application that actually renders a ton of Blender files for us and compares the results *pixel by pixel.* So that we *automatically* know when images don’t look correct. * Similar, but slightly off renders, can happen when Blender build versions are not exactly the same. For example, if your `.blend` file was built in 3.6.8, but we use `3.6.9`. So we’ve vastly improved our system for better upkeep of Blender versions. * We’ve introduced new internal code processes to auto-check code. * Restructured big parts of the application to scale better and perform faster. * We’ve written many many suites of tests that force us to immediately know when things are going awry in new features. * New internal tooling so that we can run our *own* render farm much easier. We use this farm to develop new features for you! * Improved how we handle denoising and investigated a couple tricky OPTIX denoising issues. We’ve unfortunately found that this is actually an NVIDIA driver bug and can’t do much about it, but wait. But we smoothly now force renders that must use OPTIX renders to use OPENIMAGEDENOISE (OIDN). We’re pretty proud of this and hope you enjoy too. Since launching this (this was written post-release), we’ve seen issues and total number of tickets related to rendering get cut down in more than half. I might even risk saying we’re *very* stable now. Huge kudos to the team 🤝 . Please give them a shoutout whenever you’re chatting with them, they deserve it! ## Validation The validation phase should be a bit smoother now, we’ve added a new status, and handled transitioning statuses better. # Renders Page Improvements, General App Speed, Output File Names during Download Source: https://docs.renderjuice.com/docs/product-updates/releases/renders-page-improvements-general-app-speed-output-file-names-during-download-2.4 Improved render page, faster app speed, and clearer output file names during download. UI enhancements, reduced bundle size, and better caching for improved responsiveness. Fixed sidebar issue and app styling. **Renderjuice 2.4 was released on March 29, 2024** ## Key Summary * Improved file naming for downloaded render outputs, matching the name of the .blend file. * Enhanced performance and reduced load time for the application, resulting in over 30% improvement in time to first load. * Implemented better caching strategies to make the app more responsive. * Fixed an issue where the sidebar was not staying minimized or expanded. * Improved application styling during the validation and booting phases, making it easier on users' eyes. * Fixed a strange edge case where the website app styling was intermittently getting removed, caused by an upstream dependency in the codebase. ## Download File Output Names When you used to download all render outputs from the application, the file names could end up being a little confusing, especially when you were rendering multiple scenes at the same time. The `zip` file output will now match the name of your `.blend` file so they’re easier to tell apart. ## App Load Performance, Renders Page, Navbar The renders page where you can see all your jobs should now better handle proper naming, particularly when they’re long. <Frame> <img src="https://public-assets-renderjuice.s3.amazonaws.com/changelog-assets/2-4-rose-hidden-manatee.png" /> </Frame> We noticed the app payload was quite heavy for the frontend, so we’ve reduced bundle size by a couple points, but also drastically reduced the time to load for the application (>30% improvement in time to first load). The UI was also sending off a ton of requests that were unnecessary, so we’ve implemented some better caching strategies to make the app far more responsive on your end! We fixed an edge case where the sidebar was not staying minimized or expanded. ## App Styling We improved the look of the application during the *validation* phase and the *booting* phase, so it’s a bit easier on our users’ eyes. We’ve also cleaned our code structure a little bit, so that we can ship some upcoming features 😉. We fixed a strange edge case where the website app styling was getting removed out intermittently. It turns out the cause was one of our upstream dependencies in the codebase, so we’ve fixed that! # Storage Expiry - Making way for something great. Source: https://docs.renderjuice.com/docs/product-updates/releases/storage-expiry-5.4 Storage Expiry, and more! **Renderjuice 5.4 was released on January 7, 2025** We just shipped out a new update in v5.4.1 that puts a time expiry on storage of files. This means renders older than 30 days will not be accessible. This might mostly seem like downside, but the rendering infrastructure was never intended to be used as cloud storage - but... we have our eyes set on shipping some new things to help make that happen 😉 👀, but you know, in a much much better way. ### What you should know: <Warning type="warning"> ️ Make sure any recent files uploaded and rendered are on your local machine or whatever cloud storage solution you prefer as we will not be able to recover your files 30 days after they've been rendered. </Warning> * Rendered Outputs (EXR, PNG, etc) by default will be deleted 30-days after rendering, this includes any composite node outputs. * Input files (.blend, .zip) will also be deleted by default 30 days after rendering. If you have any interest in extending or adjusting the file expiry. Let us know! We're considering making this expiry customizable, but are not committed to it yet. # Release Timeline Source: https://docs.renderjuice.com/docs/product-updates/timeline More specific changelog releases and updates to Renderjuice ## Changelog & Product Updates We're constantly updating Renderjuice with new features and improvements. Here you'll find the latest updates and improvements as soon as we release them. Larger, summarized official announcements can be found on our [official "What's New" blog](/whats-new). <Update label="2024-03-01" description="v3.0"> **Improved Small Render Jobs and Internal Testing** Rendering improvements have been made on small render jobs on Renderjuice, resulting in faster and smoother rendering for 1-10 frame cases. Additionally, internal render testing has been enhanced to ensure accurate results and includes new test cases for EEVEE and CYCLES rendering engines. [Read More](/product/updates/v3.0.0-improved-small-job-rendering) </Update> <Update label="2024-02-01"> **Improved Small Render Jobs and Internal Testing** Rendering improvements have been made on small render jobs on Renderjuice, resulting in faster and smoother rendering for 1-10 frame cases. Additionally, internal render testing has been enhanced to ensure accurate results and includes new test cases for EEVEE and CYCLES rendering engines. [Read More](/product/updates/v3.0.0-improved-small-job-rendering) </Update> <Update label="2025-01-03" title="5.3.0"> This update allows users to adjust output format, resolution, samples, and frames-per-second settings without the need to re-upload their projects. Enhanced the external stats page for better insight and introduced a new Blender integration page showcasing recent updates and integration details. </Update> # Quickstart Source: https://docs.renderjuice.com/docs/quickstart Get started with Renderjuice in less than five minutes. Using Renderjuice is pretty intuitive. At a high level, there are a few main phases: 1. Uploading 2. Validating 3. Rendering 4. Completed <Info> There are a few other sub-phases, but we've left them out here for clarity. These include Booting, Finalizing, and possible Error statuses. </Info> At each phase, our magical render wheel will let you know where you are in the process. <Tabs> <Tab title="1. Uploading"> <p> **Your render is being uploaded to our servers.** This is a one-time step. </p> <Frame> <img width="300px" src="https://mintlify.s3.us-west-1.amazonaws.com/renderjuice/images/wheel/uploading.png" /> </Frame> </Tab> <Tab title="2. Validating"> <p> **
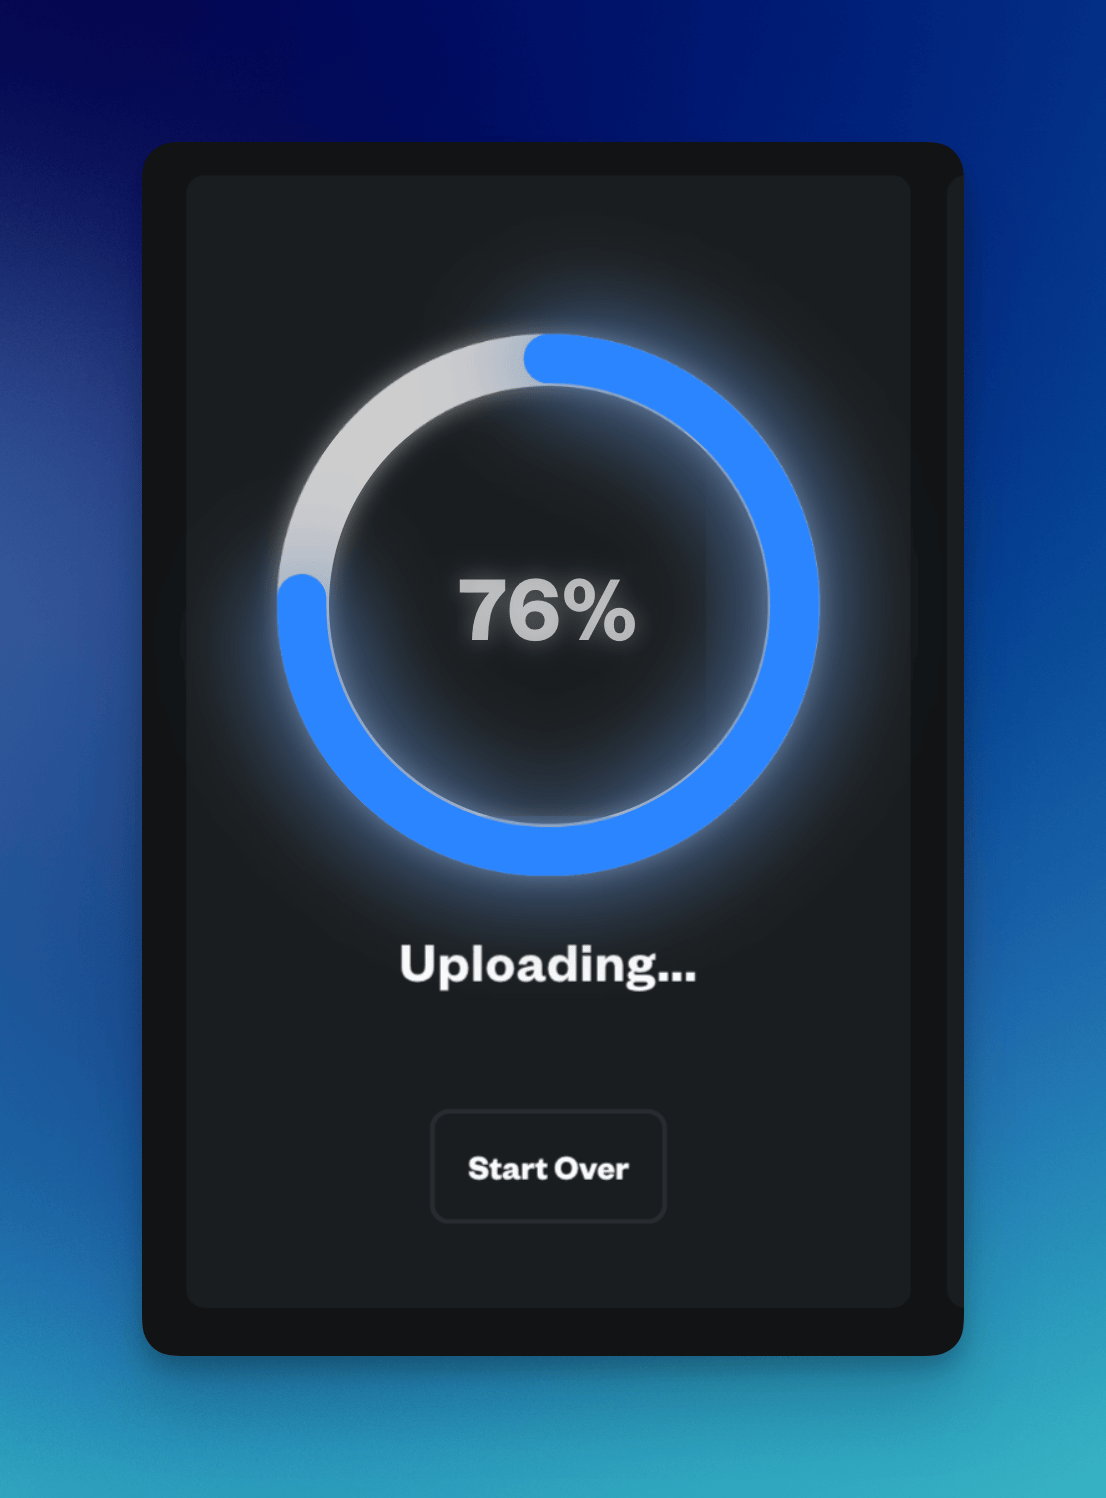
Your render is being validated.** Here we're checking conditions and analyzing your files to ensure they have the best and fastest render possible. We'll let you know if we think something might be missing, such as a texture, or a link, etc. </p> <Frame> <img width="300px" src="https://mintlify.s3.us-west-1.amazonaws.com/renderjuice/images/wheel/validating.png" /> </Frame> </Tab> <Tab title="3. Rendering"> <p> **Your file is being rendering at warp speeds 🌌** We're off to the races! This is where you relax and let Renderjuice do its thing or you can download them as they finish live. </p> <Frame> <img width="300px" src="https://mintlify.s3.us-west-1.amazonaws.com/renderjuice/images/wheel/rendering.png" /> </Frame> </Tab> <Tab title="4. Completed"> <p> **Your render is complete!** You can download your frames all at once including any extra outputs. Drop us feedback by hitting the smiley faces, they help us out and we'll probably reach out ASAP in the case of any issues. </p> <Frame> <img width="300px" src="https://mintlify.s3.us-west-1.amazonaws.com/renderjuice/images/wheel/completed-uncompressed.png" /> </Frame> </Tab> </Tabs> ## Walkthrough your first render Okay, now that you've seen the phases, let's walk through your first render. <Tabs> <Tab title="Step by Step"> <Steps> <Step title="Decide what format you want to upload with"> <Tip> [Here's a demo file](https://public-assets-renderjuice.s3.amazonaws.com/pottery.blend) to get you started. </Tip> Renderjuice accepts both `.zip` and `.blend` files. For your first render, we recommend using a simple `.blend` file. </Step> <Step title="Drag and drop your file"> Start off by dragging and dropping your file into our uploader. </Step> <Step title="Wait for validation to complete"> During this step, Renderjuice is going through your file and extracting metadata like Blender version, render settings, and missing files. </Step> <Step title="(Optional) Fix any missing files"> The UI will notify you of any missing files or dependencies when validation completes. You may fix these or proceed if you're confident the render doesn't need these. </Step> <Step title="Tweak and modify"> The UI will notify you of any missing files or dependencies when validation completes. Please fix these or proceed if you're confident the render doesn't need these. </Step> <Step title="Input the frames you want to render"> Input the frame ranges you'd like to render. Comma separated ranges like `1-100, 200-300` are supported. </Step> <Step title="Watch it go!"> You can monitor the progress of your render in real-time and download frames as they finish. </Step> </Steps> </Tab> {/* TODO: add a video and/or screenshots or arcade to get started in a more visual way <Tab title="Watch a Video"> </Tab> */} </Tabs> {/* ## Learn about each one of these steps in detail Add content directly in your files with MDX syntax and React components. You can use any of our components, or even build your own. */} {/* <CardGroup> <Card title="1. Preparing your Blender Project" icon="square-code" href="/api-playground/configuration" > Implement your OpenAPI spec and enable API user interaction. </Card> <Card title="Uploading Files" icon="square-code" href="/api-playground/configuration" > Implement your OpenAPI spec and enable API user interaction. </Card> <Card title="Uploading Files" icon="paintbrush" href="/settings/global"> Add flair to your docs with personalized branding. </Card> <Card title="Validation" icon="chart-mixed" href="/analytics/supported-integrations" > Draw insights from user interactions with your documentation. </Card> <Card title="Fixing Links & Dependencies" icon="square-code" href="/api-playground/configuration" > Implement your OpenAPI spec and enable API user interaction. </Card> <Card title="Customizing the Render" icon="square-code" href="/api-playground/configuration" > Implement your OpenAPI spec and enable API user interaction. </Card> <Card title="Host on a Custom Domain" icon="browser" href="/settings/custom-domain/subdomain" > Keep your docs on your own website's subdomain. </Card> </CardGroup> */} # Using add-ons and extensions with Renderjuice Source: https://docs.renderjuice.com/docs/rendering-with-blender/addons How to use add-ons and extensions with Renderjuice, the Blender render farm. This guide will help you prepare and use your custom addons for rendering on our platform. By the end of this guide, you’ll be able to upload your addons, and integrate them seamlessly into your render jobs. ## Status: 🔫 Beta <Warning> This feature is currently in **Beta**. </Warning> While we are continuously working to enhance this functionality, some limitations or unexpected behavior may occur. However, we have successfully tested it with the following addons: * **PSA** * **Flip Fluid** * **Shakify** * **Nishita Sky** * **Geo Scatter** And following extensions: * **Noise Nodes** If you encounter any issues, please don’t hesitate to contact our support team. ## Instructions To use add-ons with Renderjuice, you need to zip your add-on folders and upload them to your Renderjuice account. <Steps> <Step title="Prepare Your Add-on"> Before uploading your add-on, you need to make sure it's working as expected locally. * Ensure your add-on is working as expected locally, by rendering a frame. Set the sample size to lower values to speed this up. * Once you've confirmed it's working, zip the add-on folder and prepare to upload. * Ensure that you don't change the folder name when zipping it. You can find the legacy addons folder here: <CodeGroup> ```bash Windows %appdata%\Blender Foundation\Blender\[blender version]\scripts\addons\ ``` ```bash MacOS /Users/[user]/Library/Application Support/Blender/[blender version]/scripts/addons/ ``` ```bash Linux $HOME/.config/blender/[blender version]/scripts/addons/ ``` </CodeGroup> You can find the extensions folder here: <CodeGroup> ```bash Windows %appdata%\Blender Foundation\Blender\[blender version]\extensions\ ``` ```bash MacOS /Users/[user]/Library/Application Support/Blender/[blender version]/extensions/ ``` ```bash Linux $HOME/.config/blender/[blender version]/extensions/ ``` </CodeGroup> </Step> <Step title="Upload Your Add-on to Renderjuice"> After you've zipped your add-on, you can upload it to Renderjuice. 1. Login to [app.renderjuice.com](https://app.renderjuice.com) and navigate to the [Add-ons](https://www.app.renderjuice.com/addons) page. 2. **Drag and drop** or click **Upload** to upload the addon zip file. <Frame caption="Add-ons Page"> <img src="https://mintlify.s3.us-west-1.amazonaws.com/renderjuice/images/examples/addons/addons-page.png" /> </Frame> 3. Once uploaded, you can see your add-on in the list of uploaded add-ons in the **Add-ons** page. Wait for it to finish validating before using it in a render job. <Frame caption="Uploaded Add-ons"> <img src="https://mintlify.s3.us-west-1.amazonaws.com/renderjuice/images/examples/addons/uploaded-addons.png" /> </Frame> </Step> <Step title="Use uploaded Add-on in a Render Job"> Great job! Now you can use your add-on in a render job. 1. Navigate to the **Home** page. 2. Upload your blend file or choose one from recently uploaded. 3. It will redirect you to the **Configure Render** page to set your render parameters. <Frame caption="Configure Render Page"> <img src="https://mintlify.s3.us-west-1.amazonaws.com/renderjuice/images/examples/addons/render-config.png" /> </Frame> 4. In the **Add-ons** section, you can select the add-on you uploaded to use. <Tip> * If your addon isn’t listed, click the **Upload Addon** button to upload it. * This opens the Addons page in a new tab. * After uploading the addon and when it finishes validating, return to your render configuration tab, where the newly uploaded addon will now be selectable. </Tip> <Frame caption="Select Add-ons"> <img src="https://mintlify.s3.us-west-1.amazonaws.com/renderjuice/images/examples/addons/select-addons.png" /> </Frame> 5. Click **Continue** to **validate** your scene and start your **render** 🎉. <Warning> Monitor the render to ensure your add-on is working as expected, if any issue detected cancel the render, to avoid wasting credits. </Warning> </Step> </Steps> ## Important Notes * Monitor the render to ensure your add-on is working as expected, if any issue detected cancel the render, to avoid wasting credits. * For some addons e.g Flip Fluid, you need to **bake** your simulation locally and put the cache in the same zip as your `.blend` file. For more details see the [Fluid Simulations](/rendering-with-blender/fluid-simulations-with-mantaflow) guide. ## Useful Links * [Using Fluid with Render Farms](/rendering-with-blender/fluid-simulations-with-mantaflow) * [Using Simulation Nodes with Render Farms](/rendering-with-blender/simulation-nodes-with-blender) * [Preparing Your Project for Render Farms](/renderjuice-101/preparing-blender-file) <Tip> Having trouble or something doesn't seem right? Just chat with us—we're happy to help and respond quickly! </Tip> # Using Composite Node File Outputs with Render Farms Source: https://docs.renderjuice.com/docs/rendering-with-blender/composite-nodes How to use composite nodes with Renderjuice, the Blender render farm. ## Status: ✅ Fully Supported Composite nodes and composite file outputs are fully supported on Renderjuice and should work as expected out of the box 🎉 without much hassle. <Tip> If you're just using compositing for a single shot without extra file outputs, no changes are needed and everything will work as expected. </Tip> ## Example File Below is a simple example `.blend` file that utilizes a composite node setup. We use three cubes with Red, Green, Blue materials respectively. In the `Compositing` tab, we setup a composite node to key out the Red, Green, and Blue channels to three separate `.png` files via `Channel Key` nodes. <Card title="Example Simple Composite File Outputs" icon="download" href="https://public.storage.renderjuice.com/docs-example-files/rgb_key_composite_file_outputs.blend"> `.blend` file with three File Output nodes in addition to the main render. </Card> ## Instructions Luckily, no special setup is generally needed for using composite file outputs with Renderjuice. If you're compositing separate passes and writing to files via `File Output` nodes under the Compositing tab, things will still work as expected, but your file output node paths will be available as a separate bundle on download. For the file paths of the `File Output` nodes, we do our best to ensure that your compositing setup has the best chance of success. You **do not** have to setup relative pathing for file output nodes to get your compositing outputs. If we detect that your Blender scene is using composite nodes, we provide a separate tab (shown below)and buttons for downloading those outputs separately from your main render. <Tabs> <Tab title="Downloading Regular (Camera) Outputs"> <Frame caption="File Output Downloads"> <img src="https://mintlify.s3.us-west-1.amazonaws.com/renderjuice/images/download-composite-outputs.png" /> </Frame> </Tab> <Tab title="Downloading Composite Outputs"> <Frame caption="Composite Outputs"> <img src="https://mintlify.s3.us-west-1.amazonaws.com/renderjuice/images/download-node-outputs.png" /> </Frame> </Tab> </Tabs> At the time of writing, we do not preserve folder structure for composite outputs, but do our best to make it easy to download each `File Output` nodes outputs individually. You can use the dropdown combo button to download each individual file output node's outputs as shown below. <Frame caption="Downloading individual composite passes in file output nodes"> <img src="https://mintlify.s3.us-west-1.amazonaws.com/renderjuice/images/download-individual-composite-output-pass.png" /> </Frame> ## FAQ <Accordion title="Can I directly *only* render composite file output nodes?"> Unfortunately, no. This is a limitation of Blender at the moment and a long-standing issue. You can read more on the discussion with developers here [https://projects.blender.org/blender/blender/issues/57699](https://projects.blender.org/blender/blender/issues/57699) and here: [https://projects.blender.org/blender/blender/pulls/117129](https://projects.blender.org/blender/blender/pulls/117129) If this is your use case, we recommend ensuring your main shot is as dumb as possible to limit overhead or to use Multilayer EXRs for individual passes. </Accordion> # Using Fluid Simulations with Render Farms Source: https://docs.renderjuice.com/docs/rendering-with-blender/fluid-simulations-with-mantaflow How to use fluid simulations, like Mantaflow, with Renderjuice, the Blender render farm. ## Status: ✅ Fully Supported Fluid simulations, including those created with Mantaflow, are fully supported on Renderjuice and should work as expected out of the box 🎉 without much hassle. **Key Requirements:** The key requirement is that you bake your fluid simulations and include the cache files when uploading your scene. Since fluid simulations rely on cache data that isn't automatically embedded in the `.blend` file, you must zip your fluid caches along with your scene before uploading. If you're seeing `E:/` or similar in your cache path, you've not set the path correctly and it is still absolutely linked. Here's an incorrect and absolutely linked example: <Frame caption="Incorrect and absolutely linked cache path"> <img src="https://mintlify.s3.us-west-1.amazonaws.com/renderjuice/images/examples/fluid-simulations/incorrect-pathing.png" /> </Frame> ## Example Files Below are example `.blend` files demonstrating the correct and incorrect setups for fluid simulations. <CardGroup cols={2}> <Card title="Unbaked Example Incorrect ❌" icon="download" href="https://public.storage.renderjuice.com/docs-example-files/fluid-sim-incorrect.zip"> Unbaked `.blend` file with fluid simulation </Card> <Card title="Baked Example Correct ✅" icon="download" href="https://public.storage.renderjuice.com/docs-example-files/blender-fluid-sim-correct.zip"> Zipped `.blend` file with baked fluid simulation cache </Card> </CardGroup> The examples feature a simple fluid simulation setup, showcasing how baking affects the simulation during rendering. ## Instructions To use fluid simulations with Renderjuice (and likely other render farms), you need to bake the simulation and include the cache files when uploading. The most common mistakes here are forgetting to `Save` after hitting `Free All` and `Bake All` or forgetting to make sure the cache paths are relative. In the case that your paths are incorrect, we may either try to automatically fix them or your render might just miss the fluid simulation so be careful! <Steps> <Step title="Set Up Your Fluid Simulation"> Create your scene with the fluid simulation. This might involve setting up a domain, inflow objects, and configuring the simulation settings as desired. </Step> <Step title="Bake the Fluid Simulation"> After setting up your simulation, you need to bake it. To bake the fluid simulation: 1. Select the domain object. 2. Go to the **Physics Properties** panel. 3. Under **Fluid** settings, navigate to the **Settings** section. 4. Click on **Bake All** or **Bake Data** (depending on your Blender version). Or **Free All** in the case that you've already baked. <Frame caption="Physics Tab (1) Cache Path - note the `//` in the path. (2) Free All and Bake All Button (3) Bake Path Folder Icon"> <img src="https://mintlify.s3.us-west-1.amazonaws.com/renderjuice/images/examples/fluid-simulations/physics-tab-diagram.png" /> </Frame> 
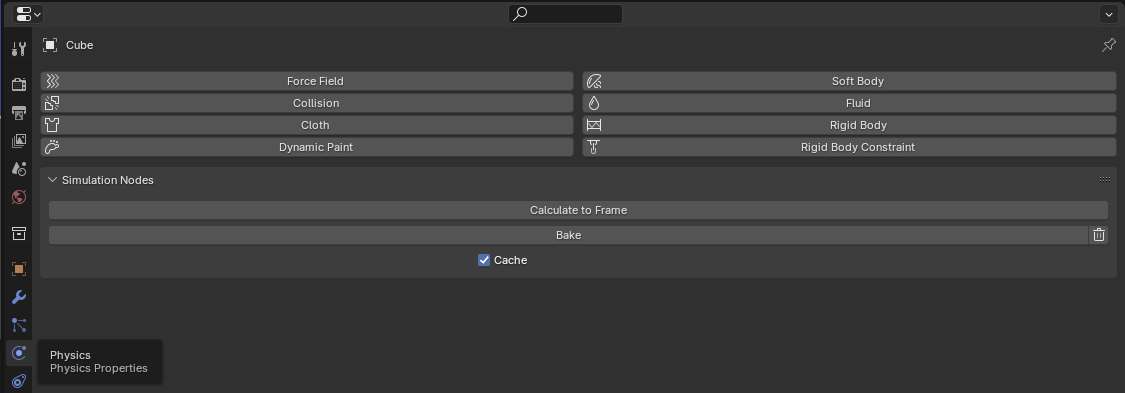
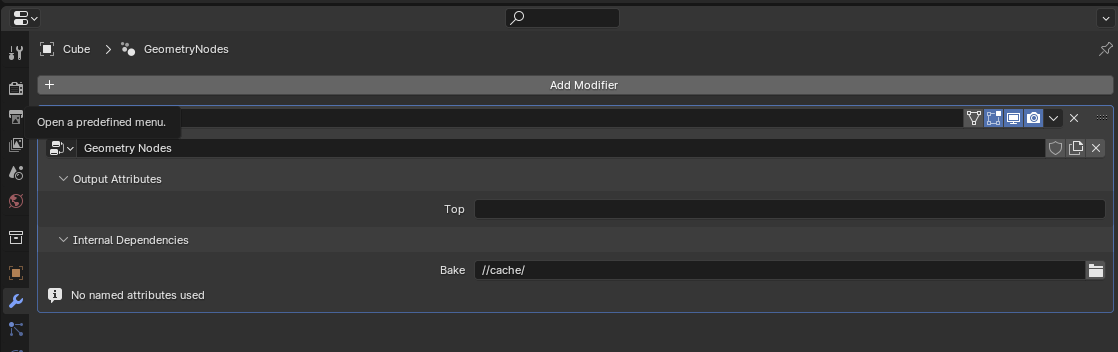
In this diagram we point out the following: 1. the `//` is Blender's way of saying "relative to the current file", you may either type in your path here using `//my-cache-folder-name` or use the folder icon to navigate to the cache location. If you have a drive like `C:\` or `D:\` here you've not set the path correctly and it is still absolutely linked. 2. Click on **Free All** and **Bake All** to bake the simulation. 3. You can use the folder icon to navigate to the cache location (which we elaborate on below). </Step> <Step title="Choose Cache Storage Location"> <Warning> By default, Blender will pick a random temporary directory for you if you haven't saved your `.blend` file yet which we don't want! </Warning> * **Verify the Cache Directory:** In the **Fluid** settings under **Cache**, verify the **Cache Directory** path. It should be set to a folder that you can include when uploading. * **Ensure Cache Pathing is Correct:** You should Free and Bake as needed so that the cache files are generated. Then **make sure to save** your `.blend` file. The last save ensures the pathing is persisted into the `.blend` and the bake step writes the cache out to the disk. You can do this by either: * Typing in the path using `//my-cache-folder-name` * Using the GUI folder picker by pressing the folder icon (3 in the diagram above) to navigate to the cache location. <Info> The name you set here does not matter, we only care that the path is relative. </Info> When using the folder icon (via GUI), you should see something like this, note that you have to click on the Cog Icon to display the option to make the pathing relative. <Frame caption="When using the folder picker GUI, you *must* click on the Cog Icon to show the option for 'Relative Path'"> <img src="https://mintlify.s3.us-west-1.amazonaws.com/renderjuice/images/examples/fluid-simulations/cog.png" /> </Frame> </Step> <Step title="Save Your Scene"> After baking, make sure to save your `.blend` file. The baked simulation references are now part of your scene. </Step> <Step title="Zip Your Scene and Cache"> Zip your `.blend` file along with the cache folder. * **Ensure the Cache Folder is Included:** The cache folder typically has a name like `cache` `blob` or similar and contains the baked simulation data. Your zip file should have a structure similar to this, where your file is included in the `zip` with your selected cache folder. Note that these extensions may vary from case to case. ```markdown your_project.zip |-- your_scene.blend |-- cache/ |-- fluid/ |-- [simulation cache files].vdb |-- config/ |-- [cache config files].uni |--mesh/ |-- [simulation cache files].bobj.gz ``` </Step> <Step title="Upload and Render"> Upload your zipped file to Renderjuice and start your render. </Step> </Steps> ## Checklist * [x] Did you bake your fluid simulation? * [x] Did you save your `.blend` file after baking? * [x] Did you include the cache folder when zipping your project? * [x] Is the cache directory path in Blender set correctly? * [x] Are all necessary objects included in the bake? ## FAQ <Accordion title="Why do I need to bake fluid simulations?"> Fluid simulations in Blender are not automatically included when rendering on a render farm. The simulation data is stored externally in cache files. Baking the simulation ensures that the fluid behavior is calculated and saved, and including the cache files ensures that the render farm can access this data to render your scene correctly. </Accordion> <Accordion title="Can I pack the fluid cache into the `.blend` file?"> No, Blender does not support packing fluid simulation caches into the `.blend` file. You must include the cache files separately by zipping them along with your `.blend` file. </Accordion> <Accordion title="How do I make sure the cache path is correct?"> In the **Fluid** settings under **Cache**, ensure the **Cache Directory** is set to a relative path. Ideally, it should be a folder next to your `.blend` file. This way, when you zip the `.blend` file and cache folder together, the simulation can find the cache files. </Accordion> <Accordion title="I'm seeing my simulation, but it's the old version!"> If you're seeing your simulation, but it's the old version, you've likely not saved your `.blend` file after baking. Make sure to save your `.blend` file after baking. As a reminder, baking writes the cache out to the disk, saving ensures your pathing is updated inside your `.blend` file to point to the baked information you just made. </Accordion> <Accordion title="Do I need to bake other types of simulations?"> Yes, other simulations like smoke, fire, and particle systems also require baking and including their cache files when rendering on a render farm, but it's usually the same process! We are looking into ways to make this a little easier in the future. </Accordion> <Accordion title="Can I use the 'Replay' cache type for fluid simulations?"> Sometimes, but it's not recommended. Instead use the **Modular** or **Final** cache type rather than **Replay**. The **Replay** cache is intended for interactive playback in the viewport and more for iterating on the simulation in the viewport and not necessarily for final renders. The Replay option basically bakes for you *as* you work on your scene, but if you make changes and Blender hasn't baked, then your changes won't be persisted. <Frame caption="The Replay Cache Type"> <img src="https://mintlify.s3.us-west-1.amazonaws.com/renderjuice/images/examples/fluid-simulations/cache-type.png" /> </Frame> </Accordion> <Tip> Having trouble or something doesn't seem right? Just chat with us—we're happy to help and respond quickly! </Tip> # Learn by Example: Demo Files and Render Setups Source: https://docs.renderjuice.com/docs/rendering-with-blender/learn-by-example A collection of example Blender setups and their final render outputs to learn how to best prepare your scenes and use Renderjuice. * Click on the cards to download example render setups and inspect to see how they were prepared for Renderjuice. * You can right click on the images themselves and press `Open Image in New Tab` to inspect the output file more closely. * Examples are sorted from simplest features and setups to more complex ones. | Symbol | Meaning | | ------ | ---------------------------------------------------------------------------------------------------------------------- | | ✨ | Feature demonstrated works out of the box with Renderjuice. No additional setup is needed only provided for education. | | 📦 | The file is packed or uses a `.zip` setup file. | | 🚀 | The file was directly uploaded as a `.blend` file without `zip` compression and/or packing. | ## Example Setups & Scenes These basic scenes utilize *very* simple setups to maximize clarity and focus on independent concepts. <CardGroup cols={2}> <Card title="Composite Nodes, Red Green Blue Keying" img="https://mintlify.s3.us-west-1.amazonaws.com/renderjuice/images/examples/composite-nodes/node-blue-keyed.png" href="https://public.storage.renderjuice.com/docs-example-files/rgb_key_composite_file_outputs.blend"> **Type:** <Tooltip tip="Works out of the box">✨</Tooltip> <Tooltip tip="Direct .blend upload">🚀</Tooltip> <br /> Demonstrates how to render using Composite Nodes and the Blender Compositing tab. <br /> <Tooltip tip="Go to "Using Composite Nodes""> **<a href="/rendering-with-blender/composite-nodes"> Learn More: Using Composite Nodes <Icon icon="link" /> </a>**</Tooltip> </Card> <Card title="Cryptomatte Suzanne on Cube" img="https://mintlify.s3.us-west-1.amazonaws.com/renderjuice/images/example-output-cryptomatte-basic.png" href="https://public.storage.renderjuice.com/docs-example-files/cryptomatte-suzanne-cube.blend"> **Type:** <Tooltip tip="Works out of the box">✨</Tooltip> <Tooltip tip="Direct .blend upload">🚀</Tooltip> <br /> Demonstrates usage of Cryptomatte nodes to render Suzanne, a Cube, and a Plane. All objects have the same material applied, but the cube has been matted-out and composited. </Card> <Card title="Simulation Nodes via Simulation Zones & Extrude" img="https://mintlify.s3.us-west-1.amazonaws.com/renderjuice/images/examples/simulation-nodes/0002.png" href="https://public.storage.renderjuice.com/docs-example-files/simulation-nodes-with-cache.zip"> **Type:** <Tooltip tip="Zipped file upload">📦</Tooltip> <Tooltip tip="Direct .blend upload">🚀</Tooltip> <br /> Demonstrates usage of simulation nodes with Renderjuice via Baking, Caching, then `zip` compression. More details are provided in our docs in the link below. <br /> <Tooltip tip="Go to "Using Simulation Nodes with Render Farms""> **<a href="/rendering-with-blender/simulation-nodes"> Learn More: Using Simulation Nodes with Render Farms <Icon icon="link" /> </a>**</Tooltip> </Card> <Card title="Fluid Simulation: A Cube Inflow & Domain Setup" img="https://mintlify.s3.us-west-1.amazonaws.com/renderjuice/images/examples/fluid-simulations/wireframe.png" href="https://public.storage.renderjuice.com/docs-example-files/blender-fluid-sim-correct.zip"> **Type:** <Tooltip tip="Zipped file upload">📦</Tooltip> <Tooltip tip="Direct .blend upload">🚀</Tooltip> <br /> Demonstrates usage of fluid simulations with Renderjuice via MantaFlow. More details are provided in our docs in the link below. <br /> <Tooltip tip="Go to "Using Fluid Simulations with Render Farms""> **<a href="/rendering-with-blender/fluid-simulations-with-mantaflow"> Learn More: Using Fluid Simulations with Render Farms <Icon icon="link" /> </a>**</Tooltip> </Card> <Card title="Rigid Body: A Falling Suzanne and Cube onto Plane" img="https://mintlify.s3.us-west-1.amazonaws.com/renderjuice/images/examples/rigid-bodies/0011.png" href="https://public.storage.renderjuice.com/docs-example-files/rigid-body-basic-351-baked-keyframes-correct.blend"> **Type:** <Tooltip tip="Works out of the box">✨</Tooltip> <Tooltip tip="Direct .blend upload">🚀</Tooltip> <br /> Demonstrates usage of rigid body simulations with Renderjuice via Baking to Keyframes. Note that you may also `zip` if desired via an external bake such as via Bake All Dynamics to disk. More details are provided in our docs in the link below. <br /> <Tooltip tip="Go to "Using Rigid Body Simulations with Render Farms""> **<a href="/rendering-with-blender/rigid-body-simulations"> Learn More: Using Rigid Body Simulations with Render Farms <Icon icon="link" /> </a>**</Tooltip> </Card> </CardGroup> # Using Rigid Body Simulations with Render Farms Source: https://docs.renderjuice.com/docs/rendering-with-blender/rigid-body-simulations How to use rigid body simulations with Renderjuice, the Blender render farm. ## Status: ✅ Fully Supported Rigid body simulations are fully supported on Renderjuice and should work as expected out of the box 🎉 without much hassle. The key requirement is that you bake your rigid body simulations before uploading your scene. You can do this in two ways: * **Bake to Keyframes:** This converts the simulation into keyframes embedded within your .blend file. * **Bake All Dynamics:** This creates a simulation cache that needs to be included with your .blend file when uploading. ## Example Files Below are two example .blend files demonstrating the correct and incorrect setup for rigid body simulations. <CardGroup cols={2}> <Card title="Unbaked Example Incorrect ❌" icon="download" href="https://public.storage.renderjuice.com/docs-example-files/rigid-body-basic-351-unbaked-incorrect.blend"> Unbaked .blend file with rigid body simulation </Card> <Card title="Baked Keyframes Example Correct ✅" icon="download" href="https://public.storage.renderjuice.com/docs-example-files/rigid-body-basic-351-baked-keyframes-correct.blend"> Baked .blend file with rigid body simulation </Card> <Card title="Baked Dynamics Example Correct ✅" icon="download" href="https://public.storage.renderjuice.com/docs-example-files/rigid-body-basic-351-baked-dynamics-correct.blend"> Baked .blend file with rigid body simulation cache </Card> </CardGroup> Both files feature the Blender Suzanne monkey and a cube dropping onto a plane, showcasing how baking affects the simulation during rendering. ## Instructions To use rigid body simulations with Renderjuice (and likely other render farms), you need to bake the simulation. There are two methods to do this: * **Bake to Keyframes:** This converts the simulation into keyframes embedded within your .blend file. * **Bake All Dynamics:** This creates a simulation cache that needs to be included with your .blend file when uploading. ### Baking to Keyframes or Baking Dynamics <Tabs> <Tab title="Bake to Keyframes"> <Steps> <Step title="Set Up Your Rigid Body Simulation"> Create your scene with the rigid body simulation. This might involve adding rigid body physics to objects like the cube and monkey mesh and setting up the simulation settings as desired. </Step> <Step title="Bake to Keyframes"> After setting up your simulation, you need to bake it to keyframes. To bake the rigid body simulation to keyframes: Select all the objects involved in the rigid body simulation. Go to the Object menu at the top, navigate to `Rigid Body > Bake To Keyframes`. In the pop-up dialog, set the frame range and baking options as needed, then click OK. <Frame caption="Baking Rigid Body Simulation to Keyframes"> <img src="https://mintlify.s3.us-west-1.amazonaws.com/renderjuice/images/rigid-body-bake-to-keyframes.png" /> </Frame> </Step> <Step title="Save Your Scene"> After baking, make sure to save your .blend file. The baked keyframes are now part of your scene. </Step> <Step title="Upload and Render"> Upload your .blend file to Renderjuice and start your render. Since the simulation is baked to keyframes, it will render correctly on the farm. <Tip> There's no need to upload any cache files or additional assets since the animation data is stored within the .blend file. </Tip> </Step> </Steps> </Tab> <Tab title="Bake All Dynamics"> <Steps> <Step title="Set Up Your Rigid Body Simulation"> Create your scene with the rigid body simulation as usual. </Step> <Step title="Bake All Dynamics"> Use the 'Bake All Dynamics' option to bake the simulation into a cache. To do this: Go to the Scene properties panel. Find the Rigid Body World settings. Under the Cache section, click on Bake All Dynamics. <Frame caption="Baking All Dynamics"> <img src="https://mintlify.s3.us-west-1.amazonaws.com/renderjuice/images/rigid-body-bake-all-dynamics.png" /> </Frame> </Step> <Step title="Choose Cache Storage"> Decide whether to store the cache externally or pack it into the .blend file: * **External Cache:** If you store the cache externally, ensure the cache files are included when uploading. You will need to zip the cache folder along with your .blend file. * **Internal Cache:** You can pack the cache into the .blend file by enabling the Internal option in the Cache settings. This way, you only need to upload the .blend file. <Frame caption="Cache Settings"> <img src="https://mintlify.s3.us-west-1.amazonaws.com/renderjuice/images/rigid-body-cache-settings.png" /> </Frame> </Step> <Step title="Save Your Scene"> After baking, save your .blend file. If you packed the cache internally, it's now embedded. </Step> <Step title="Zip and Upload (if using External Cache)"> If you used an external cache, zip the .blend file along with the cache folder and upload the zip file to Renderjuice. </Step> <Step title="Upload and Render"> Upload your .blend file (and cache if external) to Renderjuice and start your render. </Step> </Steps> </Tab> </Tabs> ## Checklist * [x] Did you bake your rigid body simulation? Whether to keyframes or as a cache. * [x] Did you save your .blend file after baking? Ensure all changes are saved. * [x] If using an external cache, did you include the cache files when uploading? * [x] Are all necessary objects included in the bake? Only selected objects or those in the cache will have their simulations baked. ## FAQ <Accordion title="Why do I need to bake rigid body simulations?"> Rigid body simulations in Blender are not automatically included when rendering on a render farm. This would be the same result if you were to transfer the file to anybody else's computer! Baking the simulation ensures that it can be rendered consistently across different environments. Whether you bake to keyframes or use a cache, this process ensures that the simulation behaves the same way on the render farm as it does on your local machine. </Accordion> <Accordion title="Can I use the 'Bake All Dynamics' option?"> Yes, you can use the 'Bake All Dynamics' option to bake your simulations. If you do this: * **Internal Cache:** Enable the Internal option in the Cache settings to pack the cache into your .blend file. You can then upload just the .blend file. * **External Cache:** If the cache is stored externally, you need to include the cache files when uploading to the render farm. Zip the cache folder along with your .blend file. <Tip> Remember to save your .blend file after baking and packing the cache. </Tip> </Accordion> <Accordion title="Do I need to bake other types of simulations?"> For other simulations like fluid or smoke simulations, you need to cache and include the cache files when uploading to the render farm. Each simulation type has its own requirements. Refer to our documentation on [Using Simulation Nodes with Renderjuice](/rendering-with-blender/simulation-nodes) for more information. </Accordion> <Accordion title="Can I edit the simulation after baking?"> * **Baked to Keyframes:** Once the simulation is baked to keyframes, you can edit the keyframes like any other animation data. If you need to make changes to the simulation settings, you'll need to re-bake the simulation to update the keyframes. * **Baked All Dynamics:** If you've baked the dynamics, you can clear the bake, make changes, and re-bake the simulation. </Accordion> <Accordion title="Which baking method should I use?"> * **Bake to Keyframes:** This method embeds the animation directly into the .blend file without the need for additional cache files. It's efficient and straightforward. * **Bake All Dynamics:** Useful if you prefer to work with simulation caches. If you pack the cache internally, it simplifies the upload process. Choose the method that best fits your workflow. </Accordion> <Tip> Having trouble or something doesn't seem right? Just chat with us—we're happy to help and respond quickly! </Tip> # Using Simulation Nodes with Render Farms Source: https://docs.renderjuice.com/docs/rendering-with-blender/simulation-nodes How to use simulation nodes with Renderjuice and other Blender render farms. ## Status: ✅ Fully Supported Simulation Nodes are Fully Supported on Renderjuice and should work fairly intuitively out of the box. The biggest thing to check is that you've cached and uploaded the cache. ## Example Files Below we’ve linked to a very basic example `.blend` file downloads with the proper setup to try to replicate. Read on for more detailed instructions and tips! <CardGroup cols={2}> <Card title="Uncached Example Incorrect ❌" icon="download" href="https://public.storage.renderjuice.com/docs-example-files/simulation-nodes-no-cache.zip"> Uncached `zip` of scene with simulation nodes </Card> <Card title="Cached Example Correct ✅" icon="download" href="https://public.storage.renderjuice.com/docs-example-files/simulation-nodes-with-cache.zip"> Cached `zip` of scene with simulation nodes </Card> </CardGroup> ## Instructions To use simulation nodes with Renderjuice and likely other render farms, at a high level you mostly just need to bake and upload the cache: <Steps> <Step title="Bake and Cache your simulation nodes"> Ensure each object inside your Blender scene that utilizes simulation nodes are baked and cached. This can be found under `Physics > Simulation Nodes > Bake` <Frame caption="Baking menu for simulation nodes under Physics > Simulation Nodes"> <img src="https://mintlify.s3.us-west-1.amazonaws.com/renderjuice/images/simulation-nodes-baking.png" /> </Frame> </Step> <Step title="Ensure the cache path"> Ensure the path to where the cached simulation is located is where you expect it. This should be inside the folder you’ll be zipping and uploading. With the object(s) that use simulation nodes selected, you can edit or set this path under `Modifiers > Internal Dependencies > Bake` By default, this will be set correctly for most scenarios. <Frame caption="Setting the cache path for simulation nodes under Modifiers > Internal Dependencies > Bake"> <img src="https://mintlify.s3.us-west-1.amazonaws.com/renderjuice/images/simulation-nodes-cache-pathing.png" /> </Frame> </Step> <Step title="Save after rebaking!"> Make sure you’re saving your `.blend` after you’ve made any changes or re-baked, because baking will change dependencies within your `.blend` file </Step> <Step title="Zip and upload your scene"> Zip your assets and upload your scene with the simulation cache on Renderjuice. </Step> <Step title="🎉 Render!" /> </Steps> ## Checklist * [x] This might seem obvious, but did you save **after** you baked? Easy to miss! * [x] Is your cache actually inside your `.zip` ? It should contain a series of data files with the file extension `.blob` and `.json` . * [x] Did you set the cache path correctly to be relative? * [x] Your directory structure should somewhat look like this: ```markdown cache/ |-- Cube_GeometryNodes/ | |-- 1014180200/ | | |-- blobs/ | | | |-- 00001_0000.blob | | | |-- 00002_0000.blob | | | |-- ... | | |-- meta/ | | |-- 00001_00000.json | | |-- 00002_0000.json | | |-- ... |-- Metaball_GeometryNodes/ | |-- 102123200/ | | |-- blobs/ | | | |-- 00001_0000.blob | | | |-- 00002_0000.blob | | | |-- ... | | |-- meta/ | | |-- 00001_00000.json | | |-- 00002_0000.json | | |-- ... |-- your_scene.blend ``` <Tip>Can’t figure it out or something confusing? Just chat with us, we’re happy to help and respond pretty quickly!</Tip> ## FAQ <Accordion title="Can I pack my simulation cache into my single blend file?"> No, Blender does not support packing simulation caches into a single file see [Blender docs on Packed Data](https://docs.blender.org/manual/en/4.2/files/blend/packed_data.html). See: You *must* use a `.zip` with Renderjuice to use simulation nodes. </Accordion> <Accordion defaultOpen title="Which nodes in Blender does this actually correspond to?"> Simulation nodes as a category can be a bit confusing. But the nodes we’re referring to here are all found under the “Simulation” category in the “Add” menu of Geometry Nodes such as Simulation Zones. <Frame caption="Simulation nodes in Geometry Nodes under Add > Simulation"> <img src="https://mintlify.s3.us-west-1.amazonaws.com/renderjuice/images/simulation-nodes-adding.png" /> </Frame> 
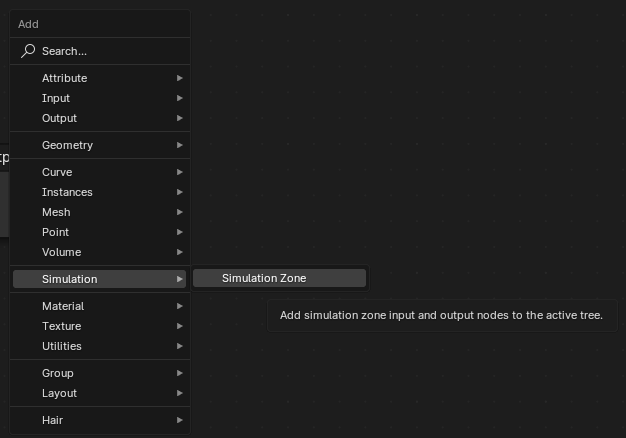
These will correspond to Simulation Input and Simulation Output nodes. All other geometry nodes, to our knowledge, will work out of the box. </Accordion> <Accordion title="Can Renderjuice support multiple simulations?"> Yes! The same instructions as above apply, but must be individually applied to each simulation. </Accordion> # Overview: Blender Feature Support on Renderjuice Source: https://docs.renderjuice.com/docs/rendering-with-blender/summary Couple things to keep in mind when using Blender with Renderjuice and other Render Farms and a summary of our support for Blender features. ## Summary & Compatibility of Supported Features To best support creatives, **all** Renderjuice plans support the vast majority of features marked with a ✅. Those that are not available on all plans will be explicitly noted below. | Symbol | Support Status | | ------ | ----------------------------- | | ✅ | Fully Supported | | 🔫 | Actively Being Worked On | | 🚧 | Planned | | ❌ | No Immediate Plans to Support | <Note>This table is comprehensive, but may not be exhaustive. Features that *are* actually supported may not be listed and vice versa.</Note> | Blender Feature | Description | Notes | Support | | --------------------------------------------------- | ------------------------------------------------------------------------------------------------------------------------- | ---------------------------------------------------------------- | ------- | | **Composite Nodes** | Compositing nodes with extra file outputs | | ✅ | | **Geometry Nodes** | Geometry nodes and procedural methods | | ✅ | | **Simulation Nodes** | Physics simulation nodes (e.g. Simulation Zones *in* and *with* other Geometry Nodes) | | ✅ | | **Rigid Body Simulations** | Simulating solid object dynamics with realistic motion and collision | | ✅ | | **Cryptomatte Nodes** | Cryptomatte nodes useful for masking and other compositing tasks on individual assets | | ✅ | | **Hair Nodes** | Procedural Hair via manipulation of curves with Geometry Nodes, released in Blender 3.5 | | ✅ | | **Stereoscopy** | Stereoscopic rendering | | ✅ | | **Alembic Imports and Links** | Importing and linking `.abc` files into your scene | | ✅ | | **Extensions and Addons** | Blender extensions and addons | | ✅ | | **Cycles Engine** | Blender's photorealistic rendering engine | | ✅ | | **EEVEE Engine** | Blender's physically based realtime rendering engine | | ✅ | | **EEVEE Next** | Blender next-gen physically based realtime rendering engine released in Blender 4.2 | | 🔫 | | **ACES Color Management** | The popular Academy Color Encoding System for color grading, supported along with other color management presets | Studio Plan | 🔫 | | **Custom Color Management** | Other custom color management configs that you have set up will work with Renderjuice and can be set up in your settings. | Studio Plan | 🔫 | | **OptiX GPU Rendering** | NVIDIA's Ray Tracing framework utilized by Blender | | ✅ | | **CUDA GPU Rendering** | NVIDIA's CUDA framework utilized by Blender | | ✅ | | **Blender Add-On and Extensions** | Addons that you may have gotten from BlenderMarket or via Blender Extensions e.g., FLIP Fluids, Botaniq, etc. | | 🔫 | | **Metal GPU Rendering** | Apple's Metal framework utilized by Blender | | ❌ | | **MantaFlow Fluid Simulations** | Blender's built-in fluid simulator. The default for fluid simulations | | ✅ | | **Multilayer EXR and Broad OpenEXR Support** | Outputs in `.exr` with multiple channels, fully supported. | | ✅ | | **TIFF Support** | Outputs in `.tiff` format, fully supported. | | ✅ | | **PNG Support** | Outputs in `.png` format, fully supported. | | ✅ | | **JPEG Support** | Outputs in `.jpg` format, fully supported. | | ✅ | | **Direct Output to MP4** | Directly encoding frames to the `.mp4` or other video formats. | Encoding video isn't recommended to mitigate against re-renders. | 🔫 | | **Select Individual Scenes from multi-scene files** | Selecting scenes from multiple in a single file. | | ✅ | | **Open Image Denoiser** | Intel's Open Image Denoiser, sometimes referred to as `OIDN` | | ✅ | | **Custom Python Scripts** | Running custom Python scripts to extend Renderjuice's functionality. | | 🚧 | | **VSE (Video Sequence Editor)** | Using the Video Sequence Editor to render video sequences. | | 🚧 | | **Grease Pencil** | Using Grease Pencil to render 2D animations. | | ✅ | Please, if anything is missing that you think should be supported, let us know! We're *always* looking to improve the experience for Blender users. It truly helps us out a ton ☀️ # Blender Versioning Source: https://docs.renderjuice.com/docs/renderjuice-101/blender-versioning How Renderjuice supports different versions of Blender. While Blender promises backwards compatibility across all versions, through loads of testing we've discovered that isn't necessarily true. It is a tough promise to keep after all. We have found that while Blender may open up and work with older files, the rendering results can be different. Sometimes it may be missing a texture, or you'll see odd black streaks on your render. This is due to the fact that the rendering engine is constantly being updated and improved. Ultimately, these are tough to trace down, so Renderjuice tries to match the Blender version you're using as closely as possible. We use a fairly extensive version matching system to match your Blender version. This is critical because Blender's render outputs change between each new update as the developers improve the product for all of us. ## How We Handle Blender Versioning Since our initial launch, we've been working relentlessly on supporting as many versions of Blender out of the box possible to iron out any strange kinks. When you start a render, we'll automatically match up the metadata of your Blender version to closely match. We may stop supporting legacy versions of Blender, especially if they're out of LTS support. At time of writing, that means we don't support Blender versions \< 2.9 If you find any issues with other versions of Blender, please reach out! We're happy to help. # GPU Minutes & Credits Source: https://docs.renderjuice.com/docs/renderjuice-101/gpu-mins How do GPU minute usage and credits work on Renderjuice? ## What you need to know * GPU minutes are the base unit to calculate everything for you and us! * GPU minutes roll-over **every single cycle**. That's right, all leftover minutes from the previous cycle are added to your total for the next cycle. * GPU minutes are currently pinned to the NVIDIA 3090. * You can add GPU minutes to your account at any time to finish off a render. However, upgrading your subscription plan is recommended because it's cheaper for both you and us. ## Understanding GPU Minutes A GPU minute is simply a minute *per GPU* spent rendering. That means, for every minute that 10 x NVIDIA 3090s are rendering, we'll count it as 10 minutes. *We do not count time spent booting, validating, and preparing the file, the time credited for is equal to time spent rendering*. Renderjuice is designed to be simple and easy to understand. We do a lot of optimization in-house to ensure that things go smoothly and convert it to a digestible format (the GPU minute) to offer the best performance and cost for you. Instead of offering a more "elusive" credit system that can come with all sorts of cost surprises when it comes time to render, our system is intended to be easy enough to do mental math with and easily approximate when placing a render. By using GPU minutes as the base, we built Renderjuice's incentives to match with those of our customers. To be concrete, this aligns Renderjuice's internal motivations to make *every minute* spent rendering be the *most performant*, because by making every GPU minute more performant, everyone benefits; we're able to trim down internal costs and in turn, help you render faster and thereby save money and time. If you're curious about the thinking behind this, read [our letter on pricing](/letters/on-pricing). ### GPU Minute Pinning We "pin" every minute spent to what we believe is the industry standard of a *good GPU minute*. At the moment that is the NVIDIA 3090. What's great about this is that as newer and faster GPUs come into the market you will be able to benefit from this forward progress in the industry. For example, the NVIDIA 4090 is approximately 2X as fast as the 3090. When the 4090 becomes the industry standard, *all users* will be able to benefit from their GPU minute essentially becoming worth twice as much because we'll then gradually move that pin from a 3090 to a 4090, so that every minute is then equal to the performance of a 4090. ### Your Credits Page The credits page is where you can manage your GPU minutes. <Tip> The minute meter below displays above 100% due to minutes being preserved and rolled over from the previous cycle, this is expected and common for our users! </Tip> <Frame caption="1. Your current plan and upgrade options 2. Add GPU Minutes 3. Your minute meter"> <img src="https://mintlify.s3.us-west-1.amazonaws.com/renderjuice/images/credits-page-diagram.png" /> </Frame> ## What happens if I run out of GPU minutes while rendering? When your GPU minutes are used up, your render will be temporarily suspended, but all outputs rendered until that point will be preserved. Not to worry, you can either... 1. Upgrade your subscription plan. 2. Purchase additional GPU minutes. <Tip> If you find yourself frequently running out of GPU minutes, upgrading your subscription plan gives the best bang for your buck. </Tip> <Frame caption="Suspension Status: 1. Click Resume to continue rendering."> <img className="w-[200px]" src="https://mintlify.s3.us-west-1.amazonaws.com/renderjuice/images/suspended-status.png" /> </Frame> Once you have enough GPU minutes to continue, you can resume your render from where it left off. {/* <div style={{ position: "relative", paddingBottom: "calc(106.40624999999999% + 41px)", height: 0, width: "100%" }}> <iframe src="https://demo.arcade.software/HxAK5TagCj27NF8Lq1bW?embed&show_copy_link=true" title="RenderJuice" frameborder="0" loading="lazy" webkitAllowFullScreen={true} mozAllowfullscreen={true} allowFullScreen={true} allow="clipboard-write" style={{ position: "absolute", top: 0, left: 0, width: "100%", height: "100%", colorScheme: "dark" }} > </iframe> </div> */} # Preparing your Project Source: https://docs.renderjuice.com/docs/renderjuice-101/preparing-blender-file A guide on using render farms with Blender. Preparing to work with render farms can frequently be difficult due to differences between the render nodes and your local computer. To elaborate, the nodes (the computers which we render your file on) need to have the same dependencies that you do on your local machine for your render. When working on a .blend file that is going to be sent off to a render farm. We recommend you take action in the following ways. <Tabs> <Tab title="Packing"> ## Pack External Assets You can pack or send along any assets that are considered external data into your Blender file. The simplest method to do this is by going to File > External Data > Pack Resources . However, this will only work with certain types of Data Blocks and is a solution for simpler Blender files. Data blocks that are capable of being Packed are Fonts, Images, Libraries, and Sounds as of Blender 3.6. You must then save the file because Blender will not automatically save your file at this point. We recommend saving it as a separate file with the suffix \_PACKED.blend ## Pack Linked Libraries Packing Linked Libraries is useful when an add-on or a data block that you use references another .blend file on your computer. By going to File > External Data > Pack Linked Libraries you pack those linked .blend files directly into one .blend file. You must then save this .blend file again to ensure it is packed. ## Set to Relative Paths When utilizing external assets that cannot be packed as mentioned above. It is highly recommended that all links are set to relative. This way when you send a zip file to our render nodes with files linked, we can simply unzip it on our end and render it with those links preserved. ## Packing Add-Ons Some add-ons have functionality specifically built to support packing and baking into your .blend file. For example, Botaniq has [great documentation](https://docs.polygoniq.com/botaniq/6.4.3/advanced_topics/render_farms/) that guides you on how to use Botaniq with render farms. Other add-ons have a specific “Bake” or “Pack” button to automatically do this for you. Please refer to your add-on’s documentation for this. ## Scene Selection Currently, we only support a single scene to be rendered at a time. If your project consists of multiple scenes, make sure that the scene you intend to render is the actively selected scene prior to uploading. We're actively working on expanding our support and improving multiple scene rendering. Please reach out if you have any questions or feedback in regards to scene selection. </Tab> <Tab title="Zipping"> ## Zipping your render <Check>`ZIP` compression is lossless. This means the zipping process is safe to use for rendering. Everything will be preserved with no impact to output quality.</Check> It can get messy when working with a lot of different linked files, textures, `.blend` files that depend on other `.blend` files and more. In these more advanced scenarios, we recommend `zip`ping your project folder to send it off. When starting a new project, try to keep your directory structure clean and all local within a single folder. It'll save you any hassle down the road whether you're working with a team or with a render farm. ### Windows Users For the most part, if your renders are simple and you don't have special characters in your file names and linked assets (excluding file extensions), the default Windows zip utility should handle it. However, it's well known that Windows' default zip utilities are unfortunately, not the best and doesn't handle special characters inside file names well. We recommend using [7-Zip](https://www.7-zip.org/) to zip your project folder or [WinRAR](https://www.rarlab.com/download.htm) to zip your project folder. * `7Zip` is free and open source. * `WinRAR` offers licenses but offers a *ahem* *"very extended"* free trial. ### Mac Users MacOS's built-in zip utility typically should handle the majority of cases fairly well. We don't necessarily require a third party app like [7-Zip](https://www.7-zip.org/) or [The Unarchiver](https://theunarchiver.com/), but it's always handy to have an extra option. ### Linux Users The same advice for Mac users apply here. The default `unzip` utility that ships with most Linux distributions should handle the majority of cases fairly well, but always good to have an extra option. </Tab> </Tabs>